Rendering rich responses from LLMs

Spencer Miskoviak
July 9, 2023

Photo by Steve Johnson
Large Language Models (LLM) have unlocked a new way of interacting with computers using natural language. However, it's more broad than only plain text since they can also understand things like markup languages for formatting and diagrams.
We can take advantage of this by encouraging an LLM to annotate it's response with markup languages like Markdown or diagrams like Mermaid.
This blog post overviews building a basic app to take advantage of this using Nextjs, Vercel AI, unified, and Mermaid.
Getting started
The first step is creating a Nextjs app following the standard installation.
# Generate a Nextjs app and configure the settings you'd like (Tailwind, App Router, etc.).
npx create-next-app@latest llm-markdown

# Change into the generated project.
cd llm-markdown

# Start the development server and go to http://localhost:3000.
npm run dev
We now have a basic app to begin integrating other packages to make calls to an LLM and render the results.
Vercel AI
The first step is to integrate with an LLM API. In this case, we are going to use OpenAI but this approach should work similarly for any LLM.
Vercel AI provides many of the API and UI primitives needed for integrating with an LLM API, notably streaming. Similarly, we can follow the standard installation to get it setup.
First, install the ai package and openai-edge (different than the official openai package).
# Install AI packages
npm i ai openai-edge
We will skip the step to create a local environment file with our OpenAI API key because that can be passed in from the UI. However, if you'd prefer to avoid that follow the steps in the installation guide to add the OpenAI API key to your local environment variables file.
Now, we can make use of these packages in a new API route: src/app/api/chat/route.ts.
This demo is using both the Nextjs
srcdirectory and App Router. The file location and name may look different if your app is configured differently.
This route is specifically named chat because that's what the Vercel AI package expects by default, but can be configured and overridden if desired.
// src/app/api/chat/route.ts

// Import the Vercel AI package and helpers for streaming OpenAI responses.
import { OpenAIStream, StreamingTextResponse } from "ai";

// Import Nextjs response helpers.
import { NextResponse } from "next/server";

// Import OpenAI SDK.
import {
  ChatCompletionRequestMessageRoleEnum,
  Configuration,
  OpenAIApi,
} from "openai-edge";

export const runtime = "edge";

// We'll cover this below...
const SYSTEM_PROMPT = `...`;

export async function POST(req: Request) {
  // This endpoint expects 3 parameters in the body:
  //  - messages: all of the user and assistant messages to maintain "memory".
  //  - token: the user's OpenAI API key (if you defined this as an env var it can be hardcoded below).
  //  - model: the GPT model to use, this allows users to try different models or access newer models.
  const { messages, token, model = "gpt-3.5-turbo" } = await req.json();

  // Standard OpenAI SDK configuration.
  // The OpenAI API Key environment variable can be hardcoded here instead.
  const configuration = new Configuration({ apiKey: token });
  const openai = new OpenAIApi(configuration);

  try {
    // Stream the response from OpenAI.
    // Pass in the system message to encourage rich formatting, and concatenate all of
    // the assistant and user messages to maintain the chat history.
    const response = await openai.createChatCompletion({
      model,
      stream: true,
      messages: [
        {
          role: ChatCompletionRequestMessageRoleEnum.System,
          content: SYSTEM_PROMPT,
        },
        ...messages,
      ],
    });

    // Surface errors from OpenAI directly to the user.
    // For example, if they don't have access to a model or run out of tokens.
    if (response.status >= 300) {
      const body = await response.json();
      return NextResponse.json(
        { error: `OpenAI error encountered: ${body?.error?.message}.` },
        { status: response.status }
      );
    }

    // Use Vercel AI APIs to effectively and efficiently stream the response.
    const stream = OpenAIStream(response);
    return new StreamingTextResponse(stream);
  } catch (e) {
    // Generic error handling for unexpected errors.
    console.error(e);
    return NextResponse.json(
      { error: "An unexpected error occurred. Please try again later." },
      { status: 500 }
    );
  }
}
This single route file provides everything we need to communicate with OpenAI models.
However, we glossed over one important detail, the system prompt message.
System instructions
The system message provides high level instructions for the conversation. This message is critical to encourage responses to be formatted with Markdown and diagrams with Mermaid.
The following is the system message used for this demonstration.
You are a general answering assistant that can comply with any request.
You always answer the with markdown formatting. You will be penalized if you do not answer with markdown when it would be possible.
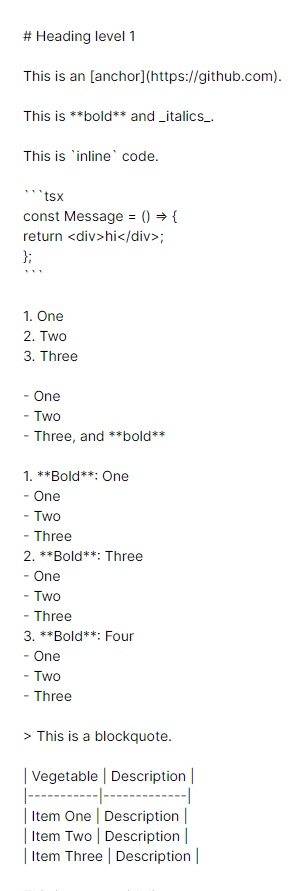
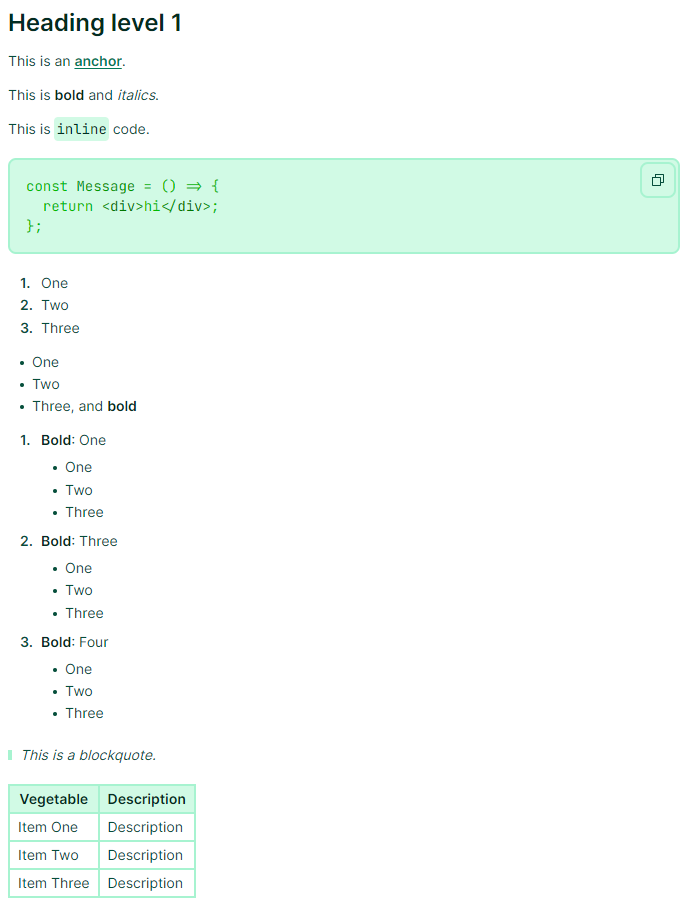
The markdown formatting you support: headings, bold, italic, links, tables, lists, code blocks, and blockquotes.
You do not support images and never include images. You will be penalized if you render images.
You also support Mermaid formatting. You will be penalized if you do not render Mermaid diagrams when it would be possible.
The Mermaid diagrams you support: sequenceDiagram, flowChart, classDiagram, stateDiagram, erDiagram, gantt, journey, gitGraph, pie.Feel free to experiment with the exact prompt as it can likely be improved, but it's a starting point. It could also be expanded to include additional markup languages or formatting.
Chat UI
The final step to integrate the Vercel AI package requires building out the UI and using the hooks it provides for maintaining state and making API calls.
We can add this to the root page.
// src/app/page.tsx

"use client";

// A custom component to handle displaying a list of user and assistant messages.
import { MessageList } from "@/components/message-list";
// Constants defined for the dynamic model.
import { SUPPORTED_MODELS, SupportedModels } from "@/components/model-dialog";
// A helper for persisting the user defined options in their browser.
import { useLocalStorage } from "@/hooks/use-local-storage";
// UI icons.
import PaperPlaneRight from "@phosphor-icons/react/dist/icons/PaperPlaneRight";
import { useChat } from "ai/react";

export default function Chat() {
  // Allow the user to define the OpenAI token and model to use when chatting.
  // This isn't necessary, but is helpful for sharing and testing.
  const [token, setToken] = useLocalStorage<string | null>("ai-token", null);
  const [model, setModel] = useLocalStorage<SupportedModels>(
    "ai-model",
    SUPPORTED_MODELS[0]
  );

  // Use the Vercel AI `useChat` hook. This will maintain all of the important state
  // we need and handle making requests.
  const { messages, input, handleInputChange, handleSubmit, error } = useChat({
    body: { token, model },
  });

  return (
    <div className="flex flex-col-reverse h-screen overflow-y-scroll">
      <div className="mx-auto w-full px-2 lg:px-8 pb-8 flex flex-col stretch gap-8 flex-1">
        {/* Render all of the available messages. */}
        {messages.length ? <MessageList messages={messages} /> : null}

        <form onSubmit={handleSubmit} className="max-w-2xl w-full mx-auto">
          {/* Render any error message when trying to chat. */}
          {error ? (
            <div className="p-3 rounded-lg bg-rose-100 border-2 border-rose-200 mb-3">
              <p className="font-sans text-sm text-red text-rose-800">
                {error.message}
              </p>
            </div>
          ) : null}
          {/* Render the chat input. */}
          <div className="relative">
            <input
              className="w-full border-2 border-slate-200 rounded-lg p-2 font-sans text-base outline-none ring-offset-0 focus:border-slate-400 focus-visible:ring-2 focus-visible:ring-offset-2 ring-emerald-600 transition-[box-shadow,border-color] pr-10 disabled:opacity-60 disabled:cursor-not-allowed"
              value={input}
              onChange={handleInputChange}
              aria-label="ask a question"
              placeholder="Ask a question..."
              disabled={!token}
            />
            <button
              type="submit"
              aria-label="send"
              className="absolute top-0 right-0 bottom-0 text-emerald-600 outline-none p-3 disabled:text-slate-600 disabled:opacity-60 disabled:cursor-not-allowed hover:text-emerald-800 focus:text-emerald-800 transition-colors"
              disabled={!input}
            >
              <PaperPlaneRight size="1em" />
            </button>
          </div>
        </form>
      </div>
    </div>
  );
}
This code provides the basics for a chat UI. It includes some nice-to-haves (such as allowing the token and model to be defined by the user) which could be simplified and hardcoded. It's also missing some pieces of UI and helpers to manage the token and model, all of which is available on GitHub.
The following code snippets provide the remaining components for rendering the chat messages between the user and the AI assistant.
// src/components/message-list.tsx

import Message from "./message";
import { Message as MessageType } from "ai/react";

interface Props {
  messages: MessageType[];
}

export const MessageList = ({ messages }: Props) => {
  return (
    <ul className="grid auto-rows-min	gap-4 max-w-2xl flex-1 mx-auto w-full">
      {messages.map((m) => (
        <Message key={m.id} message={m} />
      ))}
    </ul>
  );
};
// src/components/message.tsx

import { Message } from "ai/react";
import { UserMessage } from "./user-message";
import { AssistantMessage } from "./assistant-message";

interface Props {
  message: Message;
}

export default function Message({ message }: Props) {
  switch (message.role) {
    case "user":
      return <UserMessage>{message.content}</UserMessage>;
    case "assistant":
      return <AssistantMessage>{message.content}</AssistantMessage>;
    default:
      throw new Error(`Unknown message role: ${message.role}`);
  }
}
// src/components/user-message.tsx

interface Props {
  children: string;
}

export const UserMessage = ({ children }: Props) => {
  return (
    <li className="flex flex-col flex-1 min-w-0 gap-1 mr-6 selection:bg-indigo-300 selection:text-indigo-900">
      <p className="font-sans text-xs font-medium text-indigo-700">You:</p>
      <p className="p-2 lg:p-6 border-2 border-indigo-200 rounded-lg bg-indigo-50 font-sans text-sm text-indigo-900 min-w-0">
        {children}
      </p>
    </li>
  );
};
// src/components/assistant-message.ts

interface Props {
  children: string;
}

export const AssistantMessage = ({ children }: Props) => {
  return (
    <li className="flex flex-col flex-1 min-w-0 gap-1 ml-6 selection:bg-emerald-300 selection:text-emerald-900">
      <p className="font-sans text-xs font-medium text-emerald-700">AI:</p>
      <div className="p-2 lg:p-6 border-2 border-emerald-200 rounded-lg bg-emerald-50 text-emerald-900 min-w-0 [&>*:first-child]:mt-0 [&>*:last-child]:mb-0">
        {children}
      </div>
    </li>
  );
};
A few non-critical notes on UI-specifics:
- The styling in this demo was done with Tailwind, using the preconfigured option in the Nextjs setup.
- Custom icons were used from Phosphor.
- Typography was trimmed for precise spacing with Capsize, covered in a previous blog post.
We've now integrated with OpenAI and encouraged responses to include rich formatting. However, without any further work this formatting would still be displayed as plain text, but now with additional markup.
Markdown and Mermaid
The final step is to parse and render the messages with rich formatting as denoted by the markup in the response.
We'll accomplish this with unified with a series of remark/rehype plugins for the Markdown, and mermaid for the Mermaid diagrams.
# Install the necessary packages.
npm i rehype-highlight rehype-react remark-gfm remark-parse remark-rehype unified mermaid
There are many ways these plugins could be used, including higher-level packages such as react-markdown but the approach shared here will combine these packages into a React Hook.
We'll start by creating a React Hook that receives a string and returns a React tree of components to render that represents the formatted response.
// src/hooks/use-markdown-processor.tsx

// Custom Dialog component rendered with Radix.
import { Dialog } from "@/components/dialog";
// highlight.js syntax highlighting theme for the code blocks.
import "highlight.js/styles/base16/green-screen.css";
// Import all of the necessary packages.
import mermaid from "mermaid";
import { createElement, Fragment, useEffect, useMemo, useState } from "react";
import rehypeHighlight from "rehype-highlight";
import rehypeReact from "rehype-react";
import remarkGfm from "remark-gfm";
import remarkParse from "remark-parse";
import remarkRehype from "remark-rehype";
import { unified } from "unified";

export const useMarkdownProcessor = (content: string) => {
  useEffect(() => {
    mermaid.initialize({ startOnLoad: false, theme: "forest" });
  }, []);

  return useMemo(() => {
    return (
      unified()
        // Parse the raw string
        .use(remarkParse)
        // Add support for GitHub-flavored Markdown
        .use(remarkGfm)
        // Convert the remark tree (Markdown) into a rehype tree (HTML)
        .use(remarkRehype)
        // Add support for syntax highlighting (and avoid throwing when it's an unknown language)
        .use(rehypeHighlight, { ignoreMissing: true })
        // Convert the rehype tree (HTML) into a React component tree,
        // with custom components for each element...
        .use(rehypeReact, {
          createElement,
          Fragment,
          components: {
            a: ({ href, children }: JSX.IntrinsicElements["a"]) => (
              <a href={href} target="_blank" rel="noreferrer" className="...">
                {children}
              </a>
            ),
            h1: ({ children, id }: JSX.IntrinsicElements["h1"]) => (
              <h1 className="..." id={id}>
                {children}
              </h1>
            ),
            h2: ({ children, id }: JSX.IntrinsicElements["h2"]) => (
              <h2 className="..." id={id}>
                {children}
              </h2>
            ),
            h3: ({ children, id }: JSX.IntrinsicElements["h3"]) => (
              <h3 className="..." id={id}>
                {children}
              </h3>
            ),
            h4: ({ children, id }: JSX.IntrinsicElements["h4"]) => (
              <h4 className="..." id={id}>
                {children}
              </h4>
            ),
            h5: ({ children, id }: JSX.IntrinsicElements["h5"]) => (
              <h5 className="..." id={id}>
                {children}
              </h5>
            ),
            h6: ({ children, id }: JSX.IntrinsicElements["h6"]) => (
              <h6 className="..." id={id}>
                {children}
              </h6>
            ),
            p: ({ children }: JSX.IntrinsicElements["p"]) => {
              return <p className="...">{children}</p>;
            },
            strong: ({ children }: JSX.IntrinsicElements["strong"]) => (
              <strong className="...">{children}</strong>
            ),
            em: ({ children }: JSX.IntrinsicElements["em"]) => (
              <em>{children}</em>
            ),
            code: CodeBlock,
            pre: ({ children }: JSX.IntrinsicElements["pre"]) => {
              return (
                <div className="...">
                  <pre className="...">{children}</pre>
                </div>
              );
            },
            ul: ({ children }: JSX.IntrinsicElements["ul"]) => (
              <ul className="...">{children}</ul>
            ),
            ol: ({ children }: JSX.IntrinsicElements["ol"]) => (
              <ol className="...">{children}</ol>
            ),
            li: ({ children }: JSX.IntrinsicElements["li"]) => (
              <li className="...">{children}</li>
            ),
            table: ({ children }: JSX.IntrinsicElements["table"]) => (
              <div className="...">
                <table className="...">{children}</table>
              </div>
            ),
            thead: ({ children }: JSX.IntrinsicElements["thead"]) => (
              <thead className="...">{children}</thead>
            ),
            th: ({ children }: JSX.IntrinsicElements["th"]) => (
              <th className="...">{children}</th>
            ),
            td: ({ children }: JSX.IntrinsicElements["td"]) => (
              <td className="...">{children}</td>
            ),
            blockquote: ({ children }: JSX.IntrinsicElements["blockquote"]) => (
              <blockquote className="...">{children}</blockquote>
            ),
          },
        })
        .processSync(content).result
    );
  }, [content]);
};

// A more complex custom component for the `code` element.
const CodeBlock = ({ children, className }: JSX.IntrinsicElements["code"]) => {
  // State to display the Mermaid diagram.
  const [showMermaidPreview, setShowMermaidPreview] = useState(false);

  // Highlight.js adds a `className` so this is a hack to detect if the code block
  // is a language block wrapped in a `pre` tag versus an inline `code` tag.
  if (className) {
    // Determine if it's a mermaid diagram code block.
    const isMermaid = className.includes("language-mermaid");

    return (
      <>
        <code className={className}>{children}</code>
        {/* If the code block is a Mermaid diagram, display additional UI to allow rendering it. */}
        <div className="...">
          {isMermaid ? (
            <>
              <button
                type="button"
                className="..."
                onClick={() => {
                  setShowMermaidPreview(true);
                }}
              >
                Open Mermaid preview
              </button>
              <Dialog
                open={showMermaidPreview}
                setOpen={setShowMermaidPreview}
                title="Mermaid diagram preview"
                size="3xl"
              >
                <Mermaid content={children?.toString() ?? ""} />
              </Dialog>
            </>
          ) : null}
        </div>
      </>
    );
  }

  // Handle an inline `code` tag.
  return <code className="...">{children}</code>;
};

// A custom component to render a Mermaid diagram given the string.
const Mermaid = ({ content }: { content: string }) => {
  const [diagram, setDiagram] = useState<string | boolean>(true);

  useEffect(() => {
    const render = async () => {
      // Generate a random ID for Mermaid to use.
      const id = `mermaid-svg-${Math.round(Math.random() * 10000000)}`;

      // Confirm the diagram is valid before rendering since it could be invalid
      // while streaming, or if the LLM "hallucinates" an invalid diagram.
      if (await mermaid.parse(content, { suppressErrors: true })) {
        const { svg } = await mermaid.render(id, content);
        setDiagram(svg);
      } else {
        setDiagram(false);
      }
    };
    render();
  }, [content]);

  if (diagram === true) {
    return <p className="...">Rendering diagram...</p>;
  } else if (diagram === false) {
    return <p className="...">Unable to render this diagram.</p>;
  } else {
    return <div dangerouslySetInnerHTML={{ __html: diagram ?? "" }} />;
  }
};
This hook allows passing in a string annotated with Markdown formatting and Mermaid diagrams and generates a richly formatted React tree that can be directly rendered in our application.
The final step is to use this hook in the existing AssistantMessage component.
// src/components/assistant-message.ts

import { useMarkdownProcessor } from "@/hooks/use-markdown-processor";

interface Props {
  children: string;
}

export const AssistantMessage = ({ children }: Props) => {
  const content = useMarkdownProcessor(children);

  return (
    <li className="...">
      <p className="...">AI:</p>
      <div className="...">{content}</div>
    </li>
  );
};
Now, running this app and chatting should result in richly formatted responses. It can help to still ask for specific formatting such as including "formatted as a list/table/pie chart/etc." in the chat prompt.

Conclusion
There are many new unique and interesting use cases that LLMs unlock. Adding support for rich formatting and generating visualizations unlocks another dimension that we can interact with LLMs. What are other dimensions that should be explored?
All of the source code for this is available on GitHub.
Tags:
course
Practical Abstract Syntax Trees
Learn the fundamentals of abstract syntax trees, what they are, how they work, and dive into several practical use cases of abstract syntax trees to maintain a JavaScript codebase.
Check out the course